High-power flood lights deliver intense illumination, but they also produce concentrated heat. When that heat remains trapped, LED chips may lose brightness, drivers can fail, and protective systems may shut the fixture down. A darkened lens or flickering beam is often an early warning. It should not be ignored.
Understanding how to prevent overheating in high power flood lights begins with one practical fact: light output depends on thermal control. Dr. Roland Haitz, a respected LED industry pioneer, described LEDs as semiconductor devices rather than traditional light bulbs. That distinction matters. LEDs require proper heat paths, stable current, and suitable operating temperatures. A larger housing alone is not always enough. Poor contact between the LED board and heatsink can leave hot spots hidden inside the fixture.
This guide examines seven workable habits, including heatsink selection, airflow, installation spacing, driver protection, and regular cleaning. Each point connects laboratory principles with field experience, such as dust covering fins or sunlight heating a sealed enclosure. Some recommendations may seem obvious. They are still missed surprisingly often. Measuring surface temperature is also wiser than trusting touch, because external metal can feel moderate while internal components run dangerously hot. There is no perfect setup for every site. Humidity, mounting height, duty cycle, and ambient temperature can change the result. A careful review may reveal that an apparently efficient installation needs improvement.
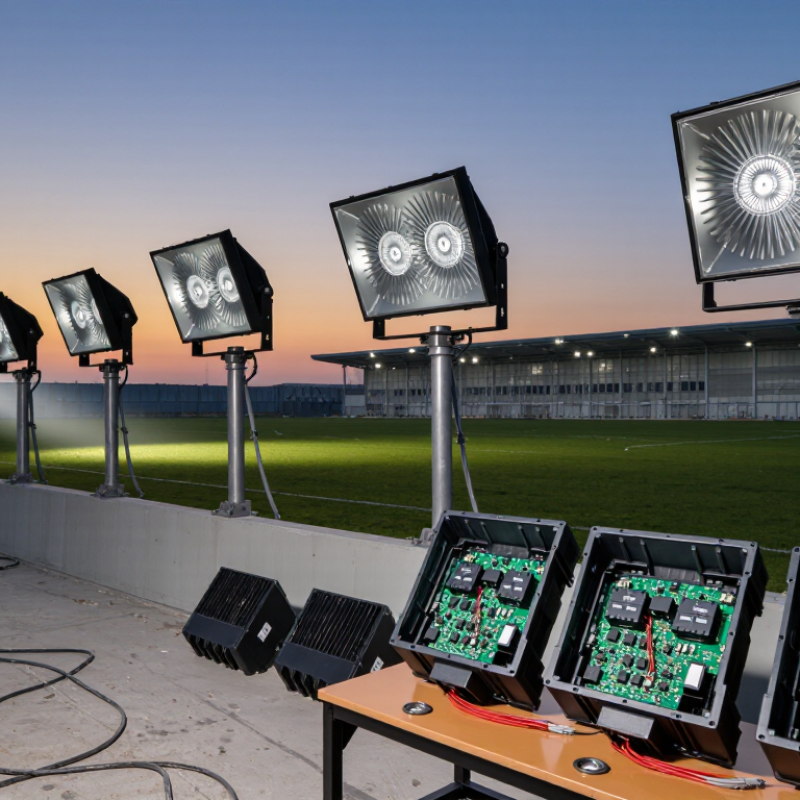
7 Tips to Prevent Overheating in High Power Flood Lights
High-power flood lights create heat as electrical energy passes through the LEDs and driver. When heat cannot escape, internal temperatures rise quickly. A sealed housing, blocked vents, or a thin mounting surface can trap that heat. Warm outdoor locations make the problem worse. Dirt on the lens may also reduce light output and encourage longer operating hours.
The driver is another common source of overheating. Unstable voltage, excessive current, or an overloaded circuit can make it run beyond its intended limits. Check the fixture’s input requirements and use suitable wiring. During installation, I have seen lights mounted against dark walls with little air space. That choice looked neat, but it reduced cooling. Small details matter.
Tips: Install the light on a solid, heat-resistant surface with clearance around the housing. Keep fins and vents clean, and inspect them after dusty weather. Avoid covering the fixture with insulation, plastic, or decorative materials. Use timers or controls to reduce unnecessary operating time. If the housing feels unusually hot, flickers, or shuts down, switch it off and inspect the driver, connections, and mounting position. Do not assume brightness proves healthy operation. A light can still shine while heat quietly damages its components. I may have underestimated ambient temperature before; testing during the hottest part of the day gives a more honest result.
High-power flood lights need more than a powerful LED module. Choose wattage according to the required brightness, mounting height, beam angle, and ambient temperature. A larger wattage can create unnecessary heat when the fixture is oversized for the area. Check the rated operating temperature and thermal derating data before installation. In site inspections, I have found that a slightly lower wattage often performs better when airflow is limited.
Use fixtures with deep aluminum housings and exposed cooling fins. Aluminum transfers heat away from the LED and driver more effectively than ordinary plastic. Avoid covering ventilation gaps with insulation, paint, or decorative panels. Keep a clear space around the housing. Clean dust from the fins regularly, especially near roads, workshops, and agricultural areas. Dust acts like a blanket.
Select heat-resistant materials for every critical part. Tempered glass can tolerate repeated temperature changes, while high-temperature silicone seals help protect internal components. Check the wire insulation rating, gasket condition, and driver enclosure. Poor seals may allow moisture inside, even when the outer casing looks intact. I once underestimated heat buildup inside a sealed fixture, and the driver failed earlier than expected. That mistake showed me that weather resistance does not always mean good thermal performance. Mount the light on a stable metal surface, avoid direct contact with combustible materials, and verify connections with a qualified electrician.
7 Tips to Prevent Overheating in High Power Flood Lights
Good installation begins with clearance. Mount the flood light on a solid, non-combustible surface, leaving space around its housing. Tight corners trap heat. Keep cables away from hot fins and avoid covering ventilation openings with insulation, paint, or loose debris. Use sealed cable entries, but do not overtighten them. A crushed gasket can block airflow and weaken weather protection.
Ventilation needs regular attention. Position the light where natural air movement can reach its rear and sides. Avoid placing several units face-to-face in a narrow passage. Clean dust from vents and heat sinks with a soft brush during scheduled inspections. Check for nests, leaves, or oily deposits. Small blockages matter. In field inspections, I have found dirty fins causing higher temperatures than expected. The fixture looked normal from a distance.
Heat dissipation also depends on the mounting contact. Tighten fixing hardware evenly, since a tilted body may transfer heat poorly. Keep the power supply and control components separated when the design allows it. Confirm the electrical load matches the fixture’s rated input. Overloading creates unnecessary internal heat. An infrared thermometer can reveal hot spots around terminals and the driver. Record readings during warm afternoons, not only in cool weather. One mistake is trusting the first installation plan too much. Sun angle, dust, and nearby walls can change thermal conditions. Review the site after several weeks.
Practical installation and maintenance guidance for high-power LED flood lights. Always follow the luminaire manufacturer’s installation instructions and the applicable electrical and safety codes.
| Tip | Recommended Practice | Installation Guidance | Ventilation and Heat-Dissipation Requirement | Field Inspection or Measurement | Expected Benefit |
|---|---|---|---|---|---|
| 1 | Install the fixture on a solid, thermally conductive surface | Secure the flood light to a rigid metal bracket, pole arm, or mounting plate. Keep the rear housing and heat sink fully supported rather than suspended by the cable or partially covered by a mounting accessory. | A firm metal mounting surface can help conduct heat away from the housing. Avoid mounting directly on thick wood, insulation, or other materials that restrict heat transfer. Keep the heat-sink face unobstructed | Confirm that all mounting bolts are tight, the bracket is not warped, and the heat-sink fins have clear contact with moving air. Check for dirt or paint buildup between the fixture and bracket. | Lower housing temperature, improved LED life, and reduced risk of thermal shutdown. |
| 2 | Maintain clearance around the heat sink | Do not place the fixture inside a tight enclosure or close to walls, ceilings, signs, or decorative covers. Preserve the clearances specified in the product installation instructions. | Natural convection requires open air around the upper and rear portions of the luminaire. Do not block ventilation slots or pack cables against the heat sink. Use the manufacturer’s minimum clearance | Measure the actual gap around the fixture after installation, including the space above the heat sink. Recheck after nearby structures, banners, or covers are added. | Better airflow, less heat recirculation, and more stable light output during long operating periods. |
| 3 | Provide cross-ventilation in enclosed or semi-enclosed locations | If an enclosure is unavoidable, provide separate low-level air intake and high-level exhaust openings. Use weather-protected openings that do not allow water to enter the electrical compartment. | Hot air rises, so the exhaust path should be above the fixture. For forced ventilation, size fans and filters according to the enclosure heat load and ambient temperature. Avoid recirculating hot exhaust air | Verify that intake and exhaust openings are not obstructed. During a hot operating period, compare the enclosure temperature with the outdoor ambient temperature. | Reduced internal air temperature and lower thermal stress on the LED driver and electronic components. |
| 4 | Keep heat-sink fins clean and unobstructed | Inspect the fixture periodically in dusty, coastal, agricultural, or industrial environments. Remove dust, leaves, insects, and deposits without bending the fins or damaging seals. | Dirt acts as an insulating layer and reduces the surface area available for convection. Use a soft brush, dry air, or a cleaning method approved for the luminaire. Clean before deposits become compacted | Look for blocked fins, corrosion, peeling coatings, and signs of discoloration. Shut off power and allow the fixture to cool before cleaning. | Preserved heat-dissipation performance and fewer hot spots caused by blocked airflow. |
| 5 | Choose the correct power rating and driver configuration | Match the fixture, LED driver, control gear, and supply voltage. Do not exceed the rated input power or install a replacement driver with a higher output than the luminaire was designed to handle. | Electrical losses become heat inside the driver and LED assembly. Use a driver approved for the luminaire and suitable for the local ambient-temperature range. Check rated input power and ambient rating | Compare the measured supply voltage and operating current with the product data. Investigate abnormal flicker, repeated shutdowns, buzzing, or excessive driver temperature. | Less unnecessary heat generation, improved reliability, and fewer premature driver failures. |
| 6 | Control ambient temperature and solar heat gain | Avoid locating the flood light near engine exhausts, hot roofs, boilers, or other heat sources. Where practical, use a shade that blocks direct solar radiation without covering the heat sink or restricting airflow. | The luminaire’s maximum rated ambient temperature includes heat from the surrounding environment. A shaded, ventilated installation can reduce the combined thermal load. Consider the hottest operating condition | Record ambient temperature near the fixture during the hottest part of the day and after several hours of operation. Compare the result with the fixture’s rated ambient limit. | Greater thermal headroom and reduced risk of lumen depreciation or automatic thermal protection. |
| 7 | Monitor operating temperature and schedule preventive maintenance | Establish a routine inspection program based on the environment and operating hours. Inspect mounting hardware, seals, cable entries, driver condition, and heat-sink cleanliness. | Use a calibrated contact probe or infrared camera as a screening tool, understanding that emissivity, reflections, and measurement location affect infrared readings. Trend readings rather than relying on one value | Measure at a consistent location after the fixture reaches a stable operating condition. Compare readings with previous inspections and the manufacturer’s temperature limits. | Early detection of blocked airflow, loose connections, failing drivers, and abnormal thermal conditions. |
Safety note: Disconnect the power before servicing or cleaning. Electrical work, enclosure modifications, and thermal testing should be performed by qualified personnel in accordance with local regulations and the luminaire manufacturer’s instructions.
High-power flood lights need more than a bright output. The International Energy Agency reports that lighting uses about 15% of global electricity. Heat, moisture, and dust can waste that energy quickly. The U.S. Department of Energy identifies thermal management as a key factor in LED performance and service life.
Tip 1: Keep clear airflow around the housing. Leave space between the fixture and nearby walls, signs, or insulation.
Tip 2: Remove dust from cooling fins every few months. A thin gray layer can trap heat.
Tip 3: Select the correct IP rating. IEC 60529 defines IP65 as dust-tight and protected against water jets, but this does not prevent internal condensation.
Tip 4: Seal cable entries carefully. Water often enters through a loose gland, not the front lens.
Tip 5: Mount the light with a slight downward angle. This helps rain drain away instead of collecting near joints.
Tip 6: Avoid direct installation above hot roofing or asphalt. Surface temperatures can become surprisingly intense.
Tip 7: Inspect discoloration, flickering, cracked seals, and unusual shutdowns. These are early warning signs.
Field inspections often expose the same mistake: a clean lens creates false confidence. Check the rear heat sink, wiring chamber, and mounting surface too. Thermal paste, gasket condition, and drainage deserve attention. The site may still be imperfect. A thermometer or infrared camera can reveal hot spots that normal inspection misses.
7 Tips to Prevent Overheating in High Power Flood Lights
High-power flood lights convert much of their electricity into heat, not visible light. The U.S. Department of Energy reports that modern LED lighting can exceed 100 lumens per watt, yet thermal management still affects performance and lifespan. The IEA estimates that lighting uses about 15% of global electricity. That makes reliable heat control important in stadiums, warehouses, roads, and construction areas.
Tip 1: Inspect vents and heat sinks before every major operating cycle. Dust, insects, and paint can block airflow around the housing. Keep at least 10 centimeters of clearance around ventilation openings. Look for darkened lenses, loose cables, or warped seals. These small signs are easy to miss.
Tip 2: Clean and monitor the fixture regularly. A thermal camera can reveal hot spots that normal inspection cannot. The U.S. DOE Solid-State Lighting reports explain that excessive junction temperature accelerates lumen depreciation and component aging. Record surface temperatures during peak operation. A single reading is useful, but repeated readings show trends. I once trusted a cool outer shell and missed a hot internal driver. That mistake changed our inspection routine. Use the manufacturer’s rated ambient temperature, but do not treat it as a guarantee. Measure real conditions, especially near roofs, asphalt, or enclosed structures. Schedule airflow checks after storms, renovation work, and heavy dust exposure.
Match wattage to brightness, mounting height, beam angle, and ambient temperature. Higher wattage can create unnecessary heat. Slightly lower wattage may work better in restricted airflow.
Choose a deep aluminum housing with exposed cooling fins. Keep ventilation gaps open. Heat needs somewhere to go.
Leave clear airflow around walls, signs, insulation, and decorative panels. Do not cover the housing with paint or insulation. Crowded mounting can cause overheating.
Use tempered glass, heat-resistant silicone seals, suitable wire insulation, and a protected driver enclosure. Inspect gaskets regularly. Weather resistance alone does not guarantee good cooling.
Dust forms a thin blanket over cooling fins. Clean the fins every few months, especially near roads, workshops, and farms. A clean lens can hide a dirty rear housing.
No. An IP65 enclosure resists dust and water jets, but condensation may still occur internally. Check cable glands, seals, and drainage paths.
Mount it on a stable metal surface with a slight downward angle. This helps rain drain away from joints. Avoid combustible materials and hot roofing.
Watch for flickering, discoloration, cracked seals, unusual shutdowns, or moisture inside the wiring chamber. An infrared camera can reveal hidden hot spots. I still miss these sometimes.
Preventing overheating is essential for keeping high-power flood lights safe, efficient, and long-lasting. This guide explains how to prevent overheating in high power flood lights by identifying common causes such as excessive wattage, poor airflow, blocked heat sinks, unsuitable fixtures, and prolonged exposure to intense heat. Selecting the correct wattage, using heat-resistant materials, and choosing fixtures designed for powerful illumination can significantly reduce thermal stress.
Proper installation is equally important. Leave enough space around the fixture, improve ventilation, and ensure that heat can escape freely. Protect lights from moisture, dust, and direct environmental heat, as these factors may damage components and reduce cooling performance. Regular inspection and cleaning can help detect blocked vents, loose connections, discoloration, or unusual brightness changes before they become serious problems. With suitable equipment, thoughtful placement, routine maintenance, and basic temperature monitoring, high-power flood lights can operate more reliably and maintain consistent performance over time.

Dorde Lights