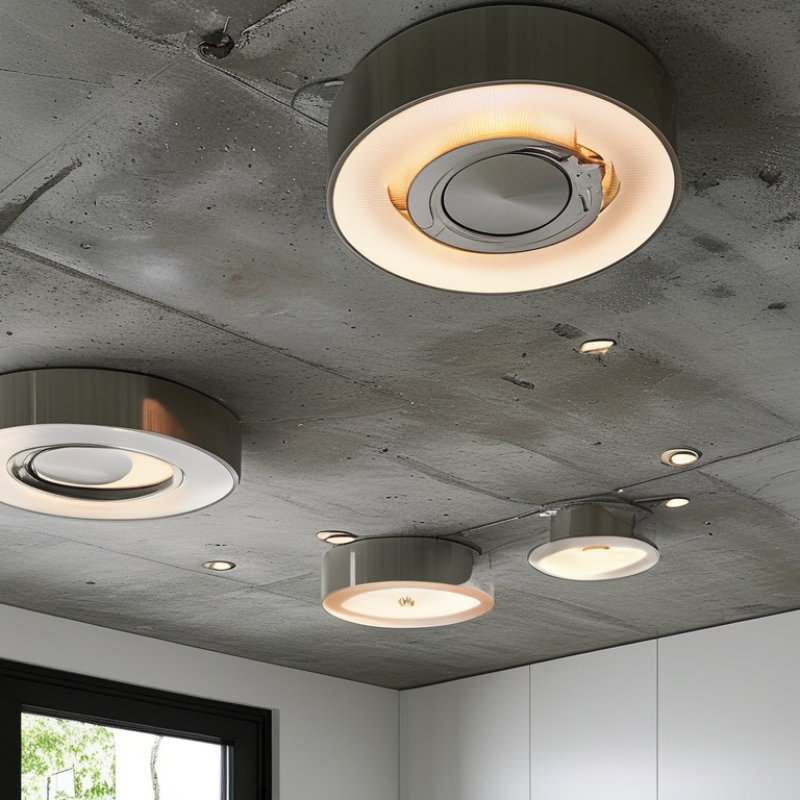
Installing recessed downlights in a concrete ceiling can be a challenging task. However, with the right guidance, it becomes manageable and even rewarding. Expert electrician John Smith, known for his innovative lighting solutions, emphasizes, “Proper planning is key when learning how to install recessed downlights in a concrete ceiling.” His advice highlights the importance of preparation in achieving a successful installation.
Concrete ceilings demand specific techniques and tools. Understanding how to navigate these prerequisites is crucial. For instance, using the correct drill bits can make a significant difference. Additionally, knowing where to position the lights can influence both functionality and aesthetics.
It’s essential to approach the installation process methodically. Common pitfalls, such as misalignment or insufficient lighting, can lead to dissatisfaction. Reflecting on past experiences can provide valuable lessons. Emphasizing the need for careful measurement and technique will lead to better results in your lighting project. Aim for a blend of efficiency and creativity in every step.
Tools and Materials Needed for Installing Recessed Downlights
Installing recessed downlights in a concrete ceiling can seem daunting. To simplify the process, having the right tools and materials is essential. You will need a power drill, a hole saw, and a chisel. A measuring tape will help you mark the placement accurately. Don’t forget safety goggles and gloves to protect yourself during installation.
Before you begin, create a plan for the lighting layout. Consider the size and spacing of each light. Mark spots on the ceiling where you want the lights. Use the hole saw to cut holes carefully. If you’re not cautious, the holes may be uneven. A chisel can help refine the edges of the holes if necessary.
Wiring is another critical aspect. Ensure you have the right gauge wire and connectors. This part can be tricky if you aren’t experienced. It’s important to check local electrical codes to avoid issues. Sometimes installation can take longer than expected. Don’t rush the process, as mistakes can lead to further delays. Proper preparation and attention to detail can improve your chances of success.
Safety Precautions to Consider Before Starting Installation
Safety is paramount when installing recessed downlights in a concrete ceiling. The process can be complex and requires proper precautions to ensure a safe environment. Before getting started, wear appropriate safety gear, including safety goggles and gloves. A hard hat is advisable if you work in a space where potential debris may fall.
It's essential to disconnect the power supply to avoid electric shocks. Use a voltage tester to confirm that the circuit is off. Inspect the ceiling for any hidden electrical wires or plumbing. Often, homeowners overlook these components. Cutting into the ceiling could lead to costly repairs or dangerous situations.
Consider the weight of the fixtures and the type of insulation used in your ceiling. Utilizing the wrong materials could lead to instability over time. If you are unsure about any step, consult a professional. It’s crucial to remember that while DIY projects can be rewarding, safety should always be your top concern.
Step-by-Step Guide to Marking and Cutting Ceiling Holes
When installing recessed downlights in a concrete ceiling, marking and cutting holes can be challenging. Start by gathering the right tools. You’ll need a pencil, a measuring tape, and a concrete hole saw. Use the measuring tape to find the right spots for your fixtures. It's crucial to get the spacing right to ensure even lighting.
Make sure to double-check your measurements. Once you have marked the spots, prepare to cut. Use the concrete hole saw for this task. It’s not always easy to cut through concrete, and mistakes can happen. If the cut is uneven, it may affect how the downlight sits in the ceiling. Be patient and steady as you work.
After cutting, clean the edges to avoid any sharp surfaces. This step ensures safety and a professional look. It’s common to encounter dust and debris during this process, so wear a mask and goggles. Reflections on the effort are important; minor errors might require adjustments later on, so take your time. Proper preparation and execution can yield impressive results.
Comparison of Recessed Downlight Installation Methods
Wiring and Connecting the Downlights in Concrete Ceilings
Wiring and connecting recessed downlights in concrete ceilings can be a challenging task. According to the National Electrical Code (NEC), proper installation ensures safety and compliance. Over 70% of electrical fires begin with improper wiring. Thus, understanding the nuances of wiring becomes crucial.
When working with concrete ceilings, use a hammer drill to create holes for wiring paths. Ensure your wiring is rated for the lighting fixtures you install. A report by the Electrical Safety Foundation International (ESFI) indicates that only 40% of DIY installations meet safety standards. This statistic highlights the importance of creating a secure connection. Vulnerable connections can result in flickering lights or even fire hazards.
Select compatible connectors to fit specific downlight models. Often, these connections can seem straightforward, yet many overlook the quality of materials. Using insufficient wiring can lead to circuit overloads. Inexperienced DIYers may find this aspect daunting, leading to unreliable installations. Always double-check connections and consult local building codes to avoid pitfalls.
Final Steps: Securing, Testing, and Finishing the Installation
When finalizing your recessed downlight installation in a concrete ceiling, securing your fixtures is crucial. Begin by ensuring that each downlight is anchored firmly. Use appropriate anchors for concrete, which can withstand the weight and vibrations over time. Tighten the screws thoroughly but avoid over-tightening, as this can damage the fixture.
Next, testing is essential. Once all fixtures are installed, power on the circuit. Observe the lights carefully. Check for any flickering or dimming. A flickering light may indicate a poor connection. If problems arise, turn off the power and inspect the wiring. Always prioritize safety during this phase.
Tips: Use a stud finder to locate any reinforcements in the ceiling. This can help you choose optimal placement for your lights. Also, consider adjusting the angle of the downlights, if possible, to achieve the best lighting effect. Remember, small changes can dramatically impact the overall illumination in your space. Make adjustments as necessary after testing, and don’t hesitate to re-evaluate your layout if the results aren’t satisfactory.
FAQS
: You'll need a power drill, a hole saw, a chisel, and measuring tape. Safety goggles and gloves are also necessary.
Create a layout plan considering light size and spacing. Mark spots on the ceiling where you want the lights.
Wear safety goggles, gloves, and a hard hat. Always disconnect power and check for hidden wires in the ceiling.
Use the right gauge wire and connectors. Always check local electrical codes. If unsure, it’s better to consult a professional.
Ensure each fixture is anchored firmly. Use appropriate concrete anchors and avoid over-tightening screws to prevent damage.
Turn off power and inspect the wiring. Flickering indicates a poor connection that needs to be fixed immediately.
Small changes in fixture angles can greatly enhance illumination. Don't hesitate to re-evaluate the layout for better results.
Cutting into the ceiling without inspecting can lead to dangerous situations or costly repairs. Always check for wires and plumbing.
Installation may take longer than expected. Don’t rush, as careful work is crucial for a successful outcome.
Ensure the chosen materials can support the weight over time. Wrong choices might lead to instability and safety concerns.
Conclusion
Installing recessed downlights in a concrete ceiling can enhance the aesthetic and functionality of any space. To successfully tackle this project, it's essential to gather the right tools and materials, including a drill, chiseling tools, and safety gear. Before starting, safety precautions must be taken seriously, such as turning off electricity and wearing protective eyewear.
The process of how to install recessed downlights in a concrete ceiling involves a systematic approach. Begin by marking and cutting holes for the fixtures, ensuring precise measurements. Once the openings are made, proceed to wire and connect the downlights carefully, adhering to electrical standards. Finally, secure the fixtures in place, conduct a test to ensure proper functionality, and finish by tidying up the installation area for a clean and professional look. This structured method will yield optimal results and a beautifully illuminated space.